How to Build a Halloween Decoration Setup on a Budget
Set a total, spend on lighting and one hero prop, make the filler yourself and shop the post-Halloween sales. A practical budget plan.
Affiliate disclosure: This guide contains links to Amazon. As an Amazon Associate we earn from qualifying purchases, at no extra cost to you. Recommendations are based on research, not hands-on testing, unless we say otherwise. How this works
The most striking Halloween houses on the street are rarely the ones that spent the most. They are the ones that chose a theme, put their money into a few things that matter and made the rest from cardboard, cloth and paint. Here is how to plan a setup that looks generous on a small budget.
The budget formula
- Set a total before you shop.
- Spend first on lighting and one focal prop you will reuse for years.
- Make the filler yourself.
- Buy next year’s upgrades in the sales after Halloween.
Step 1: Set a number and pick a theme
Decide what you are willing to spend, then choose a theme that suits it. Graveyards, ghosts and spider infestations are the cheapest themes, because their props are easy to make. Our Halloween Budget Calculator gives a rough range for different kinds of event.
Step 2: Split the budget
This split is a starting suggestion, not a rule. Adjust it to what you already own.
| Share | Goes on | Why |
|---|---|---|
| About a third | Lighting | The cheapest way to change how everything else looks. |
| About a third | One focal prop | Gives the display a centre and something to build around. |
| About a fifth | DIY materials | Cardboard, paint, cloth, tape and string for the filler. |
| The rest | Fixings and safety | Stakes, zip ties, outdoor cords, a timer and flameless candles. |
Step 3: Start with light
Swapping a white porch bulb for a coloured LED changes the whole front of a house for very little money. Add one coloured floodlight aimed up at your focal prop and the display already reads as Halloween from the street. Our outdoor lighting guide explains which colours do what.
Step 4: Buy one hero prop
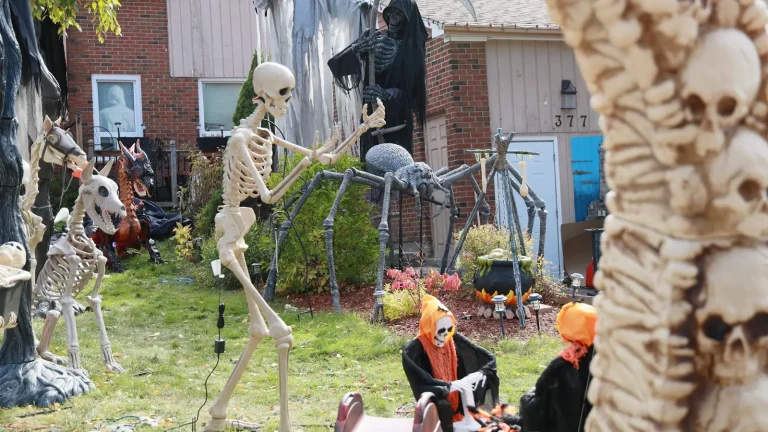
Choose a single piece that is large enough to be seen from the road: a life-size skeleton, a big spider or an inflatable. Pick something sturdy and neutral enough to restage in different scenes each year. If you are deciding between types, compare them in animatronics vs. static props vs. inflatables.
Step 5: Make the rest
Cheesecloth ghosts
Drape cheesecloth or an old white sheet over a balloon or a ball on a stick, shape it, and hang it with fishing line. Several small ghosts at different heights look better than one large one.
Cardboard tombstones
Cut stone shapes from thick cardboard or foam board, paint them grey, dab on darker paint with a sponge for texture and letter them with a marker. Tape a garden stake to the back. Cardboard will not survive rain, so bring these in or seal them if wet weather is forecast.
Bin-bag spider webs
Fold a black bin bag, cut a web pattern as you would a paper snowflake, and tape it inside a window. Backlit by a room lamp, it shows up clearly from outside.
Jar lanterns
Clean glass jars, a coat of translucent paint or tissue paper, and a battery tea light in each. Line them along steps or a wall. Use battery lights only.
Step 6: Shop at the right time
- After Halloween. Seasonal stock is commonly marked down in early November. It is the best time to buy next year’s big items, if you have somewhere to store them.
- Thrift and charity shops. Old frames, candlesticks, dolls, sheets and clothes make excellent set dressing.
- Discount stores. Good for webbing, small skeletons and battery candles.
- Your own recycling. Cardboard boxes are the home haunter’s main building material.
Step 7: Protect what you buy
A prop that lasts five years costs a fifth as much per Halloween. Anchor everything against wind, keep electricals dry and pack decorations away clean and dry. Our weatherproofing guide covers the details.
Budget-friendly supplies
These links open Amazon search results for the type of item, so you can compare what is currently available.
- Coloured LED bulbs for porch fixtures: See coloured LED bulbs on Amazon (paid link, opens in a new tab)
- Creepy cloth and cheesecloth: See creepy cloth on Amazon (paid link, opens in a new tab)
- Stretch spider webbing: See spider webbing on Amazon (paid link, opens in a new tab)
- Battery tea lights: See battery tea lights on Amazon (paid link, opens in a new tab)
Common budget mistakes
- Buying lots of small things. Ten tiny props vanish in a yard. One large one does not.
- Skipping lighting. Unlit decorations disappear at exactly the time people are looking.
- Mixing themes. A cute pumpkin beside a gory zombie weakens both.
- Forgetting fixings. A prop that blows into the road on the first windy night was not a bargain.
- Using indoor electricals outside. It is unsafe, and it ruins the equipment.
Frequently asked questions
What is the cheapest way to decorate for Halloween?
Coloured lighting plus home-made props. A coloured porch bulb, cardboard tombstones and cloth ghosts make a complete scene for very little.
When is the best time to buy Halloween decorations?
For selection, early in the season. For price, the clearance sales that usually follow Halloween, as long as you have storage space.
What should I spend the most on?
Lighting and one large, durable focal prop. Both are reusable and both are visible from a distance.
How do I make cheap decorations look good?
Keep to one theme, group items into scenes, light them from below and view the display from the street after dark before you finish.